This week, I get to start working in my new music room, and I’m excited! New school, new room, new possibilities! Since this will be my ninth year teaching, I’ve learned a few lessons about preparing a music classroom, and I’m sharing my top five classroom setup tips for music teachers.
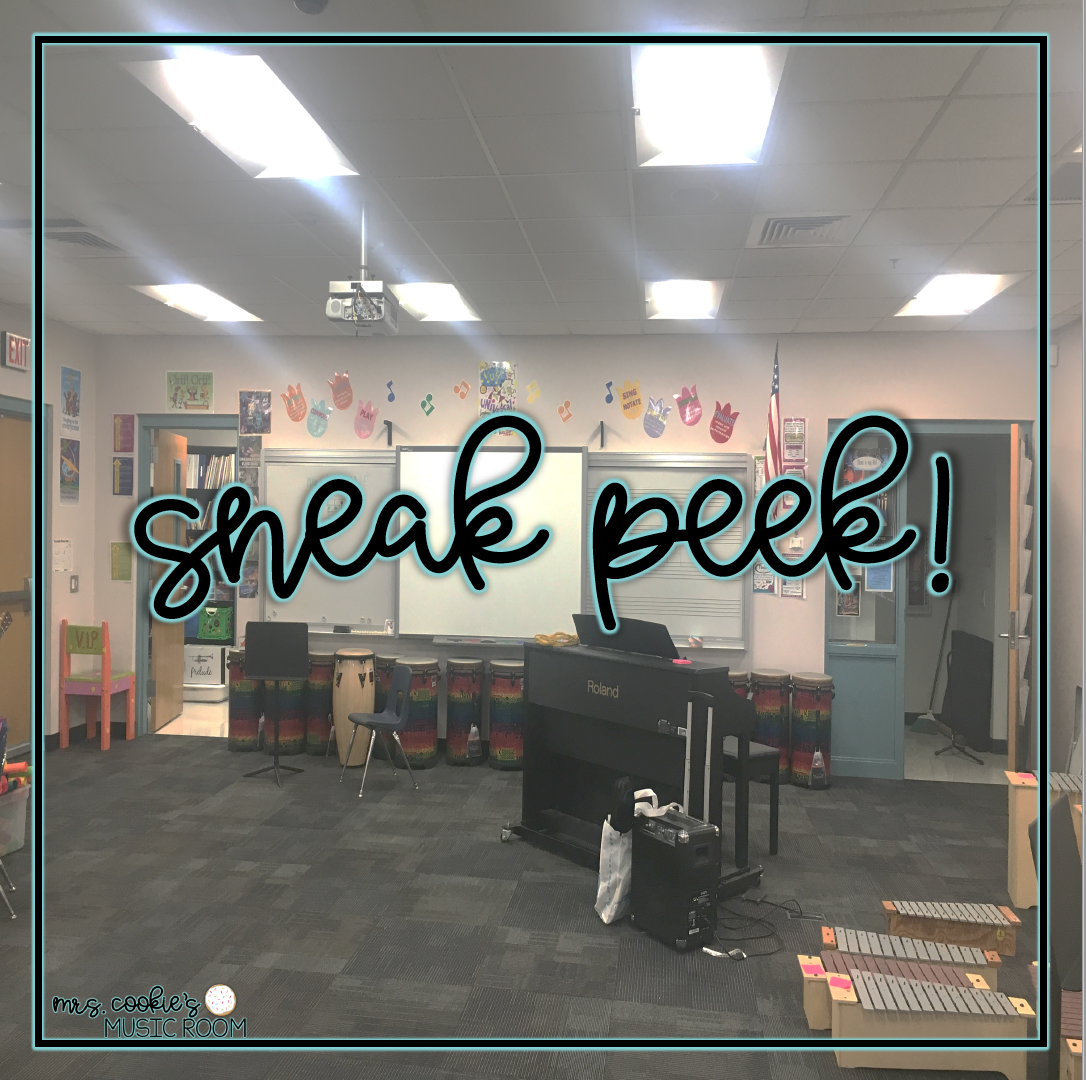
TIP #1: GET A SNEAK PEEK.
As soon as you can, get into your classroom! Look around. See what resources you’ll have. Take pictures! Get pictures of the insides of closets and cabinets, the instruments you will have, and the different walls of your room. If you can, bring a tape measure, and record the dimensions of any bulletin boards, whiteboards, and shelves that you have.
TIP #2: MAKE A PLAN.
Remember those photos? They’ll be your best friend now! Use the photos as references to help you create a diagram of your classroom. You can draw this out on paper, or if you’re Type A like me, you can create one on your computer, like so.
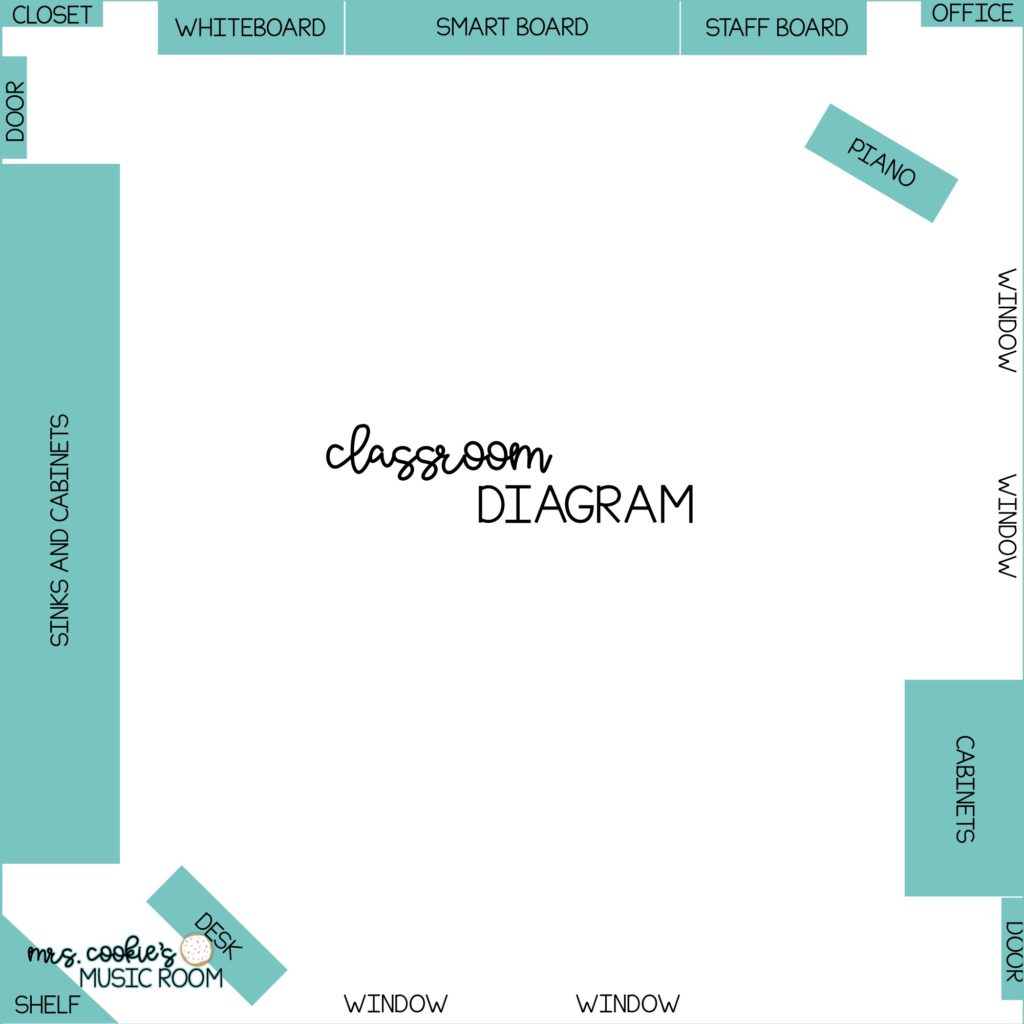
I don’t have a lot of moveable furniture to work with, but if you use PowerPoint or Keynote to create your diagram, you can move around the shapes to see where you prefer different pieces of furniture. As you plan out where things will go, think about the flow of your lesson. Where will the students line up? Where will they sit? Play instruments? Play games? Where and how will they obtain supplies like pencils and whiteboards? You may change your mind about certain things and move them around once the school year begins, but it’s good to have a plan to start with.
TIP #3: OBTAIN SUPPLIES.
Okay, if you haven’t noticed yet, I’m a planner. I plan out every little thing I can, because it puts my mind at ease. If I know what I want to do with my classroom early enough in the summer, I have time to find the best deal for everything I need. I can search Dollar Tree, Target’s dollar spot, Walmart, Michaels, Party City, and my beloved Amazon for decorations, office supplies, and organizational tools. Use measurements of your bulletin boards to determine how many yards of fabric, plastic table cloths, and/or bulletin board borders you will need. Once you’ve obtained your decorations, and printed and laminated everything you need, put them in a box with a stapler, sticky tac, glue gun, and extension cord so that you’re ready to rock and roll.
TIP#4: PLAN TO STICK AROUND.
In addition to all of my classroom setup supplies and decorations, I like to bring in a few other things for my own comfort. Music classroom setup is long and hard work, so why not make it as pleasant as possible? Wear comfy clothes and shoes. Bring plenty of water and snacks (maybe even some extra caffeine?). To pass the time, I like to bring headphones to listen to music, podcasts, and audiobooks on my phone. Most importantly? Bring a fan. Many classrooms are HOT, especially when school isn’t in session yet. That fan should follow you like a shadow around your classroom as you work.
TIP #5: ACCEPT ANY HELP.
Some teachers are lucky enough to have friends or family who are able to help them set up. If that is the case for you, take them up on the offer! They can staple borders to your bulletin boards, stick decorations on the wall, and be an extra set of hands for moving furniture. Buy them some coffee in the morning and some lunch on your break to show them appreciation for their awesomeness.
Hopefully, these tips will help make your music classroom setup as smooth as possible. You will spend countless hours in your classroom this school year, so I hope you can make it a cheerful, functional space!
Happy teaching!

P.S.
Wanna see how it turned out? Check out the tour here.


No Comments